
A commercial kitchen layout is the physical arrangement of storage, prep, cooking, service and cleaning areas inside a food production space. Get it right and food moves in one direction with nobody crossing anybody. Get it wrong and you pay for it on every single ticket, forever, in steps walked and seconds lost.
Five layout patterns cover almost every commercial kitchen in use: assembly line, zone, island, galley and open. Which one fits depends on three things, in this order: the shape of the room you have, how long and varied your menu is, and how much of your volume goes out the door in a bag rather than onto a plate. That last one is the newest and the most often ignored.
This guide covers all five patterns, where each station belongs, the aisle widths and clearances that keep people from colliding, and how to fit a packing station into a kitchen that was not designed for one. If you have not yet decided what kind of kitchen you are building, start one level up with the types of restaurant kitchen and come back here once the model is settled, because a commissary slot and a ghost kitchen suite have very different layout options.
Metrobi drivers are rated 4.97/5
Trusted by local businesses for:
- Background-checked professionals
- Specialized in business deliveries
- Same drivers for consistency
- 4.97/5 average delivery rating
The Bottom Line
- Assembly line suits high volume and a short menu. Zone suits a broad menu with specialised stations. Island needs floor space. Galley is for narrow rooms. Open is for when the cooking is part of the dining experience.
- Food should travel one way: receiving, storage, prep, cooking, plating or packing, then out. Every time the path doubles back, you have built a collision point.
- Plan aisles before equipment. A single-sided work aisle wants about 36 inches; equipment on both sides wants 42 to 48; a main traffic path wants 48 or more.
- Budget roughly 5 square feet of kitchen per dining seat, and expect back-of-house to be 30% to 40% of total floor area in a full-service venue. Run both calculations and build to the bigger number.
- Dishwashing goes next to where dirty plates arrive, not next to clean storage. This is the single most common expensive mistake.
- If more than about a fifth of your orders leave the building, give packing its own bench, its own holding and its own door. Sharing the expo pass between dine-in and delivery is what jams a kitchen at 7pm.
- Local health, fire and accessibility codes override every rule of thumb here. Confirm clearances with your authority before anything is bolted down.
What a commercial kitchen layout is and what it covers
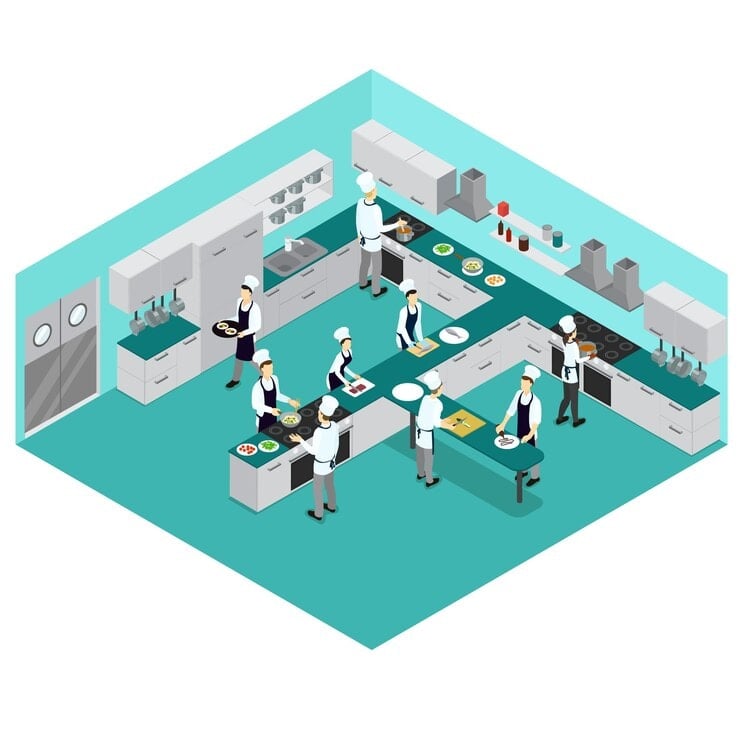
The layout is the floor-level plan: which zones exist, how big each one is, where the equipment sits within them, and how people and food move between them. A complete layout accounts for six functional areas.
- Receiving and storage. Where deliveries land, plus dry storage, walk-in refrigeration and freezer space. Should sit near the back door and near prep, and nowhere near the dish pit.
- Food preparation. Washing, cutting, portioning and mixing. Needs the most counter space and its own sink.
- Cooking. The hot line, under the hood: ranges, fryers, griddles, ovens, combi units.
- Service, plating or packing. Where finished food is assembled for the pass or bagged for a courier. Needs hot and cold holding.
- Cleaning and dishwashing. Three-compartment sink or machine, soiled landing, clean landing, drying racks.
- Staff and administration. Handwashing stations, lockers, the manager’s corner, chemical storage kept away from food.
Two tests tell you whether a layout is actually working. First, draw the path of one dish from receiving to the customer and count how many times it crosses another dish’s path going the other way. Second, stand at the busiest station and count how many steps a cook takes to fetch something they need every ticket. Both numbers should be small, and both are much cheaper to fix on paper than after the gas lines go in.
The five commercial kitchen layouts compared
| Layout | Shape of the room | Menu it suits | Delivery volume it handles | Main weakness |
|---|---|---|---|---|
| Assembly line | Long and rectangular | Short, focused, repeatable | Very high | Inflexible if the menu changes |
| Zone | Square or wide | Long and varied | Moderate | Needs more square footage and more staff |
| Island | Open, generous | Varied, chef-supervised | Moderate | Wastes space in a small kitchen |
| Galley | Narrow corridor | Short by necessity | Moderate to high | Two cooks and it is crowded |
| Open | Any, facing guests | Showpiece dishes | Low | Noise, smell, finishes, and nowhere to pack |
The patterns are not mutually exclusive. Plenty of working kitchens run a zoned back section feeding an assembly-line finishing and packing run at the front, which is often the best answer for a restaurant doing solid business on both channels.
The assembly line kitchen layout
Stations sit in a straight sequence: ingredients enter at one end, move through cooking, and finish at plating or packing at the other. Nobody doubles back. It is the fastest layout per ticket and the easiest to staff with less experienced cooks, because each person owns one step rather than one dish.
It therefore dominates high-volume, limited-menu production and delivery kitchens. If you are pushing a few hundred near-identical orders through a shift, the assembly line will beat anything else on this list on throughput and on consistency.
The cost is rigidity. The line is tuned for the menu it was built around, so adding dishes with different cooking methods means either breaking the sequence or building a second one. It also needs a genuinely long run of floor, which rules it out in a square room.
The zone kitchen layout
The kitchen splits into blocks by activity or by dish type: a prep zone, a grill zone, a fry zone, a salad and cold zone, a dish zone. Each zone has the equipment and the counter space for its own work, and cooks specialise.
It handles menu complexity better than any other pattern, and full-service restaurants with long menus keep landing on it for that reason. Several very different dishes can be produced at once without anyone queueing for the same station.
The trade-offs are square footage and headcount. Zones duplicate counter space and sometimes equipment, and a zoned kitchen staffed thinly leaves whole areas idle while one station drowns. It also needs real communication discipline, because the components of one plate are now coming from three places and have to arrive at expo together.
The island kitchen layout
The main cooking block sits in the centre of the room, usually under a central hood, with prep, storage, dishwashing and service arranged around the perimeter. The chef in the middle can see everything, which makes supervision and communication easy.
Island layouts feel good to work in when there is space for them. Cooks move around a single hub instead of down a corridor, and expo can be positioned so nobody shouts.
The requirement is unavoidable: you need enough floor that the perimeter walkway stays generous on all four sides. In a cramped room an island becomes an obstacle, and the walkway that was supposed to be 48 inches becomes a 30-inch squeeze where two people with trays meet.
The galley kitchen layout
Stations line two parallel walls with a single corridor between them. It is the most space-efficient pattern there is, which is why food trucks, ghost kitchen suites and small urban kitchens almost all use it, usually without choosing to.
Everything is within reach, movement is minimal, and one or two cooks can run a lot of volume in a very small footprint. It is also the pattern most sensitive to menu length: there is no room to add a station, so the menu has to be short and the prep has to be done in advance or elsewhere.
The constraint to watch is the corridor. Two people passing with hot pans in a 36-inch aisle is a burn waiting to happen, and in a galley there is no alternative route.
The open kitchen layout
An open layout exposes the line to the dining room, either fully or through a pass-through window. It turns cooking into part of the guest experience and it does build trust, because customers can see their food being made.
What it demands in return is serious: ventilation good enough that the dining room does not smell of fryer oil, noise control, finishes that look presentable and survive commercial cleaning, and a crew who are comfortable being watched all service.
Open layouts are the worst fit for delivery volume of any pattern here. Bagging orders, stacking insulated totes and handing off to couriers is the least attractive work in the building, and in an open plan it happens in front of guests. If off-premise is more than a trickle, screen it.
The stations every commercial kitchen layout has to place
Whichever pattern you choose, the same stations need homes, and most layout failures are one station in the wrong place rather than the wrong pattern.
- Receiving to storage. Shortest possible path from the back door to the walk-in. Every extra foot is carried by hand, in bulk, several times a week.
- Cold storage to prep. Prep should be able to reach the walk-in without crossing the hot line. If cooks are walking through the grill station to get lettuce, the layout is wrong.
- Prep to cooking. Adjacent, with a landing surface between them. Finished prep should be put down, not carried across the room.
- Hot line under the hood. Fixed by your ventilation, which makes it the most expensive thing to move later. Decide the hood run first and build outward from it.
- Expo and plating at the pass. Directly between the line and the dining room door, with hot holding and a heat lamp.
- Packing and staging for off-premise. Its own bench, with bag and container storage underneath, hot and cold holding beside it, and shelf space for completed orders. See the delivery section below.
- Dish pit next to where dirty plates land. Which means close to the dining room entrance to the kitchen and close to the bussing path, not tucked past the line. Clean storage goes on the far side of the pit from the soiled landing so nothing crosses back.
- Handwash sinks at every zone boundary. Codes require them and inspectors count them. If a cook has to leave their station to wash their hands, they will wash them less often. The same logic applies to every control point in your HACCP compliance plan: a thermometer or a log sheet that lives across the room gets used less than one at the station.
Aisle widths and equipment clearances for a commercial kitchen
These are the working numbers most design guides converge on. Your local code may be stricter and if it is, it wins.
| Space | Typical working minimum |
|---|---|
| Single-sided work aisle | 36 inches |
| Aisle with equipment on both sides | 42 to 48 inches |
| Main traffic path through the kitchen | 48 inches or more |
| Cook line to back prep counter | 36 to 48 inches |
A few clearances that are not about width. Leave service access to anything with a compressor or a motor, because a technician who cannot reach the back of a unit will charge you to move it. Keep required clearances to combustibles around fryers and ranges, which is a fire-code matter rather than a convenience one. Equipment and installation standards published by NSF International govern how food equipment may sit relative to walls and adjacent fixtures, and inspectors do check it.
Build the aisles into the plan before you select equipment, not after. It is the correct order and almost nobody does it, which is why so many kitchens end up with a beautiful spec sheet and a 30-inch pinch point beside the fryer.
How much floor space a commercial kitchen needs
Two benchmarks are worth running, and they will disagree with each other.
The per-seat figure: roughly 5 square feet of kitchen per dining seat is the most commonly cited planning number for full service. The ratio figure: back-of-house at 30% to 40% of total floor area, rising toward 55% in production-heavy formats with minimal seating. Published commercial kitchen design benchmarks note that these do not reconcile for most seat counts, so calculate both and build to the larger number.
Three things push you toward the higher end of every range. A long menu, because it needs more stations and more cold storage for more SKUs. Scratch cooking, because prep space is the first thing to run short. And high off-premise volume, because packaging, insulated bags and completed-order staging consume floor space that a dine-in kitchen never had to find.
Where the packing and staging station belongs in a delivery kitchen
This is the part most layout guides still treat as an afterthought, and it is where a modern kitchen actually jams. A delivery order is not finished when the food is cooked. It has to be bagged, sealed, labelled, matched to the right driver and held at temperature until that driver arrives. None of that happens at the expo pass without stealing time from dine-in service.
A packing station that works has five things:
- Its own bench, long enough to lay out the largest order you take, with container, bag, lid and label storage underneath so nobody walks for packaging.
- Hot and cold holding beside it, because the gap between cooking and collection is dead time the food has to survive. Cold items need to stay at 41°F or below through the whole handoff, not just in the walk-in.
- Staging shelves sized for your peak, not your average. If ten bags can wait without being restacked, drivers collect in seconds. If they cannot, somebody is sorting bags on a counter during the rush.
- A courier path that does not cross the hot line. Ideally drivers reach the staging shelf from a side or back entrance and never enter production. This is also a food-safety and a liability matter, not just a workflow one. If you use an outside courier rather than your own staff, the staging shelf should be the only part of the kitchen a driver ever needs to reach; Metrobi supports local delivery in Minneapolis and other metro areas on that model.
- Order visibility at the station. Whatever tells the packer what is in each order and whose it is needs to be readable from the bench, so sealed bags are not reopened to check. A screen works, and so does a dedicated restaurant kitchen printer putting a ticket on the bag itself.
Where it goes depends on your pattern. In an assembly line, packing is simply the last station, which is why delivery-first kitchens pick that pattern. In a zone kitchen, put it between expo and the exit as its own zone rather than annexing part of expo. In a galley, the only workable answer is usually the end of the corridor nearest the door, with the staging shelving going vertical because there is no floor to spare.
Five commercial kitchen layout mistakes that cost you ticket time
- Choosing equipment before planning aisles. You cannot shrink a 48-inch walkway to fit a combi oven that is already paid for.
- Putting the dish pit on the wrong side of the kitchen. Dirty plates then travel through production, and clean dishes travel back the same way.
- No landing space beside anything. Every oven, fryer, walk-in and dish machine needs a surface next to it to put things down on. Without it, cooks hold hot pans while they look for room.
- Treating the pass as the packing station. It works at ten off-premise orders a night and collapses at forty, which is a volume you can reach faster than you can rebuild a kitchen.
- Forgetting the back door. Receiving, waste, grease collection and courier pickup all use it. If it opens into your prep area, every one of those becomes a contamination and congestion problem at once.
How to plan a commercial kitchen layout step by step
- Measure the real room. Actual walls, columns, ceiling heights, existing drains, gas and electrical capacity, and where the hood can physically be vented. Vent routing constrains more layouts than floor area does. Read what your commercial lease permits at the same time, because structural work, roof penetrations for ventilation and who pays for the grease interceptor are all lease questions before they are design questions.
- Write the menu down first. Count the cooking methods it needs. That count, not your seat count, determines how many stations and how much hood length you are buying.
- Split your volume by channel. Dine-in, takeout, delivery, catering or wholesale. Put a number on each, including where you expect it to be in two years, because that decides how much of the room goes to packing and staging.
- Pick the pattern that fits the room and the menu. Long room and short menu, assembly line. Wide room and long menu, zone. Generous floor, island. Narrow, galley. Guest-facing showpiece, open.
- Draw the zones before the equipment. Block out receiving, storage, prep, cooking, expo, packing and dish as areas, then draw the aisles between them at the widths above.
- Place equipment into the zones. Start with the hood run, because it is the most expensive thing to move, then work outward.
- Walk the paths. Trace one dine-in dish, one delivery order, one dish return and one incoming pallet. Any crossing is a problem to solve now.
- Check it against code and against your food safety plan. Handwash sink count and placement, clearances, egress, grease interceptor. The layout has to make your food safety monitoring easy to carry out, because control points you cannot physically reach are control points nobody checks.
Frequently asked questions about commercial kitchen layout
What are the five types of commercial kitchen layout? Assembly line, zone, island, galley and open. Assembly line runs a straight path for high volume and short menus, zone divides the kitchen by activity for long menus, island centres cooking with everything else around it, galley lines two parallel walls in a narrow space, and open exposes the line to the dining room.
Which commercial kitchen layout is best for delivery orders? Assembly line, because packing becomes the last station on a path the food is already travelling down. Whatever pattern you use, the deciding factor is whether packing has its own bench, its own hot and cold holding, enough staging shelf space for your peak, and a courier route that avoids the hot line.
How wide should commercial kitchen aisles be? Around 36 inches for a single-sided work aisle, 42 to 48 inches where there is equipment on both sides, and 48 inches or more for a main traffic path. These are working minimums, and local health, fire and accessibility codes can require more.
How much space does a commercial kitchen need? Plan on roughly 5 square feet of kitchen per dining seat, and expect back-of-house to occupy 30% to 40% of total floor area in a full-service restaurant. The two calculations rarely agree, so run both and build to the larger figure. Long menus, scratch cooking and high off-premise volume all push you higher.
Where should the dishwashing area go in a commercial kitchen layout? Next to where dirty plates arrive from the dining room, with the soiled landing on the entry side and the clean landing on the far side feeding storage. Putting the dish pit deep in the kitchen forces dirty plates through production, which is both a congestion and a contamination problem.