
Precise cuts, consistent results, and improved efficiency – that’s what you’ll gain by honing your knife skills in 2024.
In this guide, you’ll discover the fundamental knife cuts every chef should know, tips for maintaining your knives’ sharpness and longevity, and advanced techniques to add finesse to your dishes.
An experienced chef and recipe developer knows that mastering knife skills is essential for creating professional-quality dishes. From achieving the perfect medium dice for stir fry to executing precise cuts for a great class demonstration, these techniques are fundamental to culinary success.
By honing your knife skills, you’ll be able to tackle a wide range of recipes with confidence and efficiency. If you’re looking to amplify your cooking experience even further, consider utilizing a reliable service for your ingredient delivery. A quick and efficient Washington DC same-day courier service can ensure that you have the freshest ingredients at your fingertips, allowing for smoother meal preparation and creativity in your culinary efforts.
For those in the Philadelphia area, utilizing a dependable Philadelphia same-day courier service can help streamline your ingredient delivery, ensuring that you have what you need when you need it most. This convenience allows you to focus on perfecting your knife skills without the distraction of last-minute grocery runs.
Sharpen your skills and elevate your cooking with our expert insights on the art of knife work. If you’re looking for a seamless cooking experience, consider integrating a reliable ingredient delivery system into your routine. Our Miami same-day delivery service ensures you have fresh ingredients delivered right to your door, making it easier to focus on perfecting your knife skills and creating culinary masterpieces.
Metrobi drivers are rated 4.97/5
Trusted by local businesses for:
- Background-checked professionals
- Specialized in business deliveries
- Same drivers for consistency
- 4.97/5 average delivery rating
Master the 10 Essential Knife Cuts to Elevate Your Cooking
Mastering these 10 essential knife skills is the cornerstone of becoming a confident and proficient cook. By learning and practicing these fundamental techniques, you’ll not only gain the confidence to tackle any recipe but also create visually stunning and professionally executed dishes with ease.
Slice like a pro with the forward and backward slice
The forward and backward slice is a fundamental knife technique that every chef should master. This technique involves holding the knife with your dominant hand and using a gentle rocking motion to slice through ingredients, such as vegetables or fruits.
Master the foundational forward and backward slice technique
To begin, hold the knife with your dominant hand, gripping the handle firmly but not too tightly. Place the tip of the knife on the cutting board, with the ingredient in front of the blade. Use your non-dominant hand to hold the ingredient steady, tucking your fingertips under your knuckles to avoid accidentally cutting yourself.
Gently press down on the knife and slide it forward to slice through the ingredients. As you reach the end of the slice, lift the knife slightly and draw it back towards you, maintaining contact with the cutting board. Repeat this forward and backward motion, keeping the knife tip on the board, to create even slices.
Learn to maintain consistent thickness for even cooking
One of the key benefits of mastering the forward and backward slice is the ability to create slices of consistent thickness. This is important for even cooking and attractive presentation. To achieve consistent slices, focus on maintaining a steady rhythm and applying even pressure throughout the cutting motion.
As you practice, pay attention to the thickness of your slices. Aim for slices that are uniform in width, ensuring that they will cook at the same rate and create a visually appealing dish.
Practice slicing vegetables like cucumbers and carrots for perfect results
To perfect your forward and backward slicing technique, practice on a variety of vegetables. Cucumbers and carrots are excellent choices for beginners, as they are relatively firm and easy to slice.
Start by trimming off the ends of the cucumber or carrot. If desired, peel the vegetable using a vegetable peeler. Cut the vegetable in half lengthwise, then place the flat side down on the cutting board for stability. Use the forward cut side down and backward slice technique to create even slices, keeping your fingers tucked under your knuckles to avoid injury.
As you gain confidence, try slicing other vegetables, such as zucchini, eggplant, or bell peppers. With practice, you’ll be able to create perfect slices every time.
Unleash precision with the cross-chop
The cross chop, also known as the dice, is a technique used to create small, uniform pieces of ingredients. This method is particularly useful for vegetables like onions and potatoes, which are often diced for recipes such as soups, stews, and sautés.
Discover the cross-chop method for dicing onions and potatoes
To begin the cross chop, start with an ingredient that has been sliced using the forward and backward technique. For example, if you’re dicing an onion, first cut the onion in half from top to bottom, peel off the skin, and make horizontal slices parallel to the cutting board, leaving the root end intact to hold the onion together.
Next, make large dice in a series of vertical slices perpendicular to the horizontal ones, again keeping the root end intact. Finally, slice across half the onion, creating small, uniform pieces. The size of your dice will depend on the width of your slices in each direction.
Create uniform pieces for better texture and presentation
The cross-chop technique allows you to create small, evenly sized-pieces that cook at the same rate and provide a consistent texture throughout your dish. Uniform pieces also enhance the visual appeal of your finished recipe, as the ingredients will be well-distributed and aesthetically pleasing.
When dicing ingredients, aim for small dice or pieces that are roughly the same size. This ensures that the ingredients cook evenly and makes for a more attractive presentation.
Refine your cross-chopping skills with regular practice
As with any knife skill, practice is key to mastering the cross chop. Start with larger dice sizes and work your way down to smaller, more precise cuts as you gain confidence.
In addition to onions and potatoes, practice your cross-chopping skills on other vegetables, such as carrots, celery, and bell peppers. As you become more comfortable with the technique, challenge yourself to create smaller, more uniform pieces.
Remember to always keep your fingers tucked under your knuckles when holding the ingredient, and take your time to ensure accurate cuts.
Effortlessly mince garlic and herbs with the two-handed rock chop with your knife blade
The two-handed rock chop is an essential technique for mincing delicate ingredients like onion, garlic, and herbs. This method allows you to create finely minced ingredients without crushing them, preserving their flavor and aroma.
Learn the two-handed rock chop for mincing delicate ingredients
To begin the two-handed rock chop, start by peeling and trimming your ingredients, such as garlic cloves or fresh herbs. Place the ingredient on your cutting board and hold the knife with your dominant hand, gripping the handle firmly.
Place your non-dominant hand on top of the blade, near the tip, applying gentle pressure to keep the blade in contact with the cutting board. Use a rocking motion to chop the ingredients, moving the knife back and forth while keeping the tip on the board. As you chop, use your non-dominant hand to guide the blade and apply pressure as needed.
Achieve finely minced garlic and herbs without crushing them
The key to successful mincing with the two-handed rock chop is to use a gentle touch and a sharp knife. A sharp blade will easily slice through the ingredient, while a gentle touch ensures that when slicing you don’t crush or bruise delicate items like garlic or herbs.
As you mince, periodically gather the ingredients back into a pile using the side of your knife. This allows you to continue mincing until the desired consistency is achieved.
Master the rocking motion for speed and efficiency
With practice, the two-handed rock chop will become a quick and efficient way to mince ingredients. As you become more comfortable with the technique, you’ll be able to increase your speed while maintaining control over the knife.
To master the rocking motion, focus on keeping the knife tip in contact with the cutting board and using your non-dominant hand to guide the blade. Maintain a consistent rhythm and apply even pressure throughout the chopping motion.
Practice mincing a variety of ingredients, using aromatic herbs such as garlic, shallots, parsley, cilantro, and mint. As you gain confidence, you’ll be able to mince ingredients quickly and easily, adding fresh flavors to your dishes.
By mastering these three essential knife techniques—the forward and backward slice, the cross chop, and the two-handed rock chop—you’ll be well on your way to becoming a confident and skilled chef. Remember to always prioritize safety, keep your knives sharp, and practice regularly to refine your skills. With time and dedication, you’ll be able to create stunning, flavorful dishes that impress your family and friends.
Prioritize Knife Safety and Maintenance for Long-lasting Performance
Knife Safety and Injury Prevention:
69% of knife-related accidents in the workplace result in the employee being off work for at least 3 days.
38% of knife-related injuries reported to the HSE involve cuts to the hand or fingers.
The Health and Safety Executive receives an average of 40 cases per month related to knife accidents.
Always keep your knives sharp for optimal safety and control
A sharp knife is a safe knife. While it may seem counterintuitive, dull knives are more dangerous than sharp ones. With a dull blade, you need to apply more pressure to cut through food, increasing the risk of the knife slipping and causing injuries. Sharp knives, on the other hand, require less force and provide better control, reducing the likelihood of accidents.
To test your knife’s sharpness, try cutting through a sheet of paper. A sharp knife should easily slice through without tearing or snagging. If your knife struggles to make a clean cut, it’s time to sharpen it. Establish a regular sharpening routine based on how frequently you use your knives.
Knife Injuries:
350,000 people are injured by kitchen knives each year.
Over 33% of kitchen-related injuries involve knives.
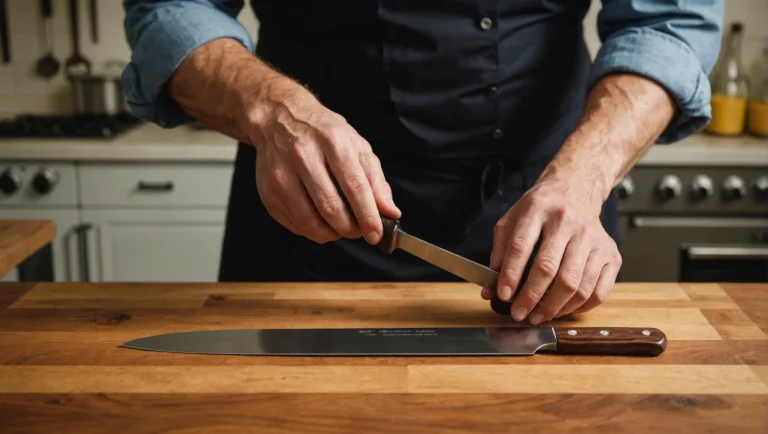
Understand the difference between honing and sharpening
Honing and sharpening are two distinct processes that help maintain your knives’ performance. Honing involves realigning the blade’s edge using a honing steel, while sharpening removes small amounts of metal to create a new, sharp edge. Hone your knives before each use to keep the edge straight and sharp, but be sure to sharpen them when honing no longer restores their cutting ability.
Secure your cutting board to prevent slips and injuries
A stable cutting surface is crucial for knife safety. Invest in a non-slip cutting board or place a damp towel underneath your board to keep it from sliding around. This simple step can significantly reduce the risk of accidents caused by a shifting cutting board.
Ensure your cutting surface is at a comfortable height to maintain proper posture and control while cutting. A good rule of thumb is to have your cutting board at or slightly below elbow level. Keep your cutting area clean and organized, removing any clutter that could interfere with your work or cause distractions.
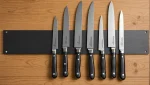
Store your knives properly to maintain their edge and prevent damage
Proper knife storage is essential for maintaining the blades’ sharpness and preventing accidents. Use a knife block, magnetic strip, or sheath to store your knives safely. These storage solutions protect the blades from damage and keep them easily accessible.
Avoid storing knives loosely in drawers, as this can cause the blades to bump against each other, dulling the edges and potentially causing injuries when reaching into the drawer. Always clean and dry your knives thoroughly before storing them to prevent rust and maintain their longevity.
Adopt a pinch grip for better control and precision
The pinch grip is the most important and fundamental knife skill to master. This grip involves holding the knife with your thumb and index finger pinching the blade just in front of the handle, while your remaining fingers wrap around the handle. The pinch grip provides better control and precision compared to gripping the handle alone.
By adopting the pinch grip, you’ll have more control over the knife’s movements, allowing for more accurate cuts and reducing the risk of accidents. Practice this grip consistently until it becomes second nature, and you’ll notice a significant improvement in your knife skills and overall cooking performance.
Always cut on a cutting board and never on hard surfaces
One of the most important rules for knife safety and maintenance is to always cut on a cutting board. Cutting on hard surfaces like countertops, plates, or glass can damage your knife’s edge, causing it to dull quickly or even chip.
Use a cutting board made from wood, bamboo, or plastic to protect your knives and maintain their sharpness. These materials provide a gentler surface that won’t harm the blade’s edge. Remember to replace your cutting boards when they become heavily scarred or develop deep grooves, as these can catch the knife’s edge and cause accidents.
Sharpen Your Skills: Essential Sharpening Techniques for Every Cook
Understand the basics of knife sharpening
Before diving into the techniques, it’s crucial to grasp the fundamentals of knife sharpening. Honing and sharpening are two distinct processes that serve different purposes. Honing involves realigning the blade’s edge using honing steel, while sharpening removes small amounts of metal to create a new, sharp edge. Regularly honing your knives can help maintain their sharpness, but when the edge becomes dull or damaged, it’s time to sharpen.
To determine if your knife needs sharpening, perform a simple paper test. Hold a sheet of paper vertically and gently slice through it with your knife. A sharp blade should cut cleanly and easily, while a dull one will tear or struggle to cut through the paper. Another sign that your knife needs sharpening is if it requires more pressure than usual to make cuts or if it slips when slicing through food.
When choosing sharpening tools, consider your skill level and preferences. Whetstones are the traditional choice and offer the most control, but they require practice and patience to master. Electric sharpeners are more convenient and user-friendly, but they may remove more metal than necessary and can damage your blades if used improperly.
Master the art of using a whetstone for razor-sharp edges
Using a whetstone is the most effective way to achieve a razor-sharp edge on your knives. To begin, select the appropriate whetstone grit based on the condition of your blade. A coarse grit (around 1000) is ideal for repairing damaged or very dull knives, while a medium grit (around 3000) is suitable for regular sharpening. A fine grit (6000 or higher) is used for polishing and refining the edge.
Before sharpening, soak your whetstone in water for 10-15 minutes to lubricate the surface and prevent metal particles from clogging the stone. Place the whetstone on a damp cloth or non-slip mat to keep it stable during use.
To sharpen, hold the knife at a consistent angle (usually between 15-20 degrees) against the flat side of the stone. With light pressure, slide the blade across the stone from heel to tip, maintaining the angle throughout the motion. Repeat this process a few times on each side of the blade, alternating sides to ensure an even edge.
Tips for successful whetstone sharpening
-
Practice maintaining a consistent angle by using angle guides or marking the blade with a permanent marker
-
Apply light, even pressure to avoid damaging the blade or creating an uneven edge
-
Sharpen in one direction only, from heel to tip, to prevent burrs and inconsistencies
-
Rinse the stone frequently to remove metal particles and keep the surface clean
-
Finish with a few light strokes on a fine grit stone to polish and refine the edge
Regular practice is key to mastering whetstone sharpening. Set aside time to sharpen your knives and hone your skills, as this will ensure your blades remain in top condition and make your cooking experience more enjoyable.
Explore alternative sharpening methods for convenience
While whetstones offer the most control and precision, they may not be the most practical choice for everyone. Pull-through sharpeners and honing steels provide quick and easy alternatives for maintaining your knives’ edges.
Pull-through sharpeners feature pre-set angles and abrasive wheels that sharpen your blade as you draw it through the device. These tools are ideal for beginners or those who want a hassle-free sharpening experience. However, be cautious when using pull-through sharpeners, as they can remove more metal than necessary and may damage your blades if used too frequently or aggressively.
Honing steels, on the other hand, do not actually sharpen your knife but instead, realign the edge to keep it straight and sharp. Honing should be done regularly, ideally before each use, to maintain your knife’s performance. To hone your knife, hold the steel vertically with the tip resting on a cutting board. Draw the blade down the steel at a 20-degree angle, applying light pressure and alternating sides with each stroke.
When to seek professional sharpening services
For heavily damaged, chipped, or specialty blades, it may be best to entrust the sharpening to professionals. Skilled knife sharpeners have the equipment and expertise to restore even the most challenging edges without causing further damage. They can also help maintain the proper geometry and balance of your blades, ensuring optimal performance.
When selecting a professional sharpening service, look for experienced technicians who use high-quality equipment and techniques. Ask about their process, turnaround time, and pricing to ensure you’re getting the best value for your knives.
By mastering these essential sharpening techniques and utilizing the right tools for your needs, you’ll be able to keep your knives in peak condition and elevate your cooking skills to new heights.
Execute precise julienne and brunoise cuts for elegant presentations
Mastering the julienne and brunoise cuts is essential for creating visually appealing dishes with consistent, bite-sized pieces. The julienne cut involves cutting ingredients into thin, matchstick-like strips, typically 1/8 inch x 1/8 inch x 2-3 inches long. To achieve this, start by cutting your ingredients into rectangular planks, then stack the planks and slice them into even thin strips.
The brunoise cut takes the julienne a step further by dicing those thin strips into tiny cubes, roughly 1/8 inch on all sides. To create a brunoise, gather your julienned strips and cut them crosswise at regular intervals. Practice maintaining consistent size roll cut and shape for both cuts to ensure even cooking and a polished presentation.
Applying julienne and brunoise cuts in your dishes
Once you’ve mastered these cuts, incorporate them into your dishes for an elevated look and texture. Use julienned vegetables like carrots, zucchini, or bell peppers to add color and crunch to salads, stir-fries, or as garnish. Brunoise cuts are perfect for adding subtle flavor and delicate texture to sauces, soups, or as a topping for canapés.
Tackle challenging ingredients with ease using the tournée cut
The tournée cut, also known as “turning” vegetables, creates a football-like shape with seven sides. This advanced technique is often used on firm vegetables like potatoes, carrots, or turnips, resulting in an elegant presentation and ensuring even cooking. To execute a tournée cut:
-
Start with a well-peeled vegetable and cut off one end to create a flat base.
-
Hold the vegetable with your free hand, your non-dominant hand, using your thumb as a guide for the knife.
-
With your dominant hand, make a curved cut by rotating the vegetable a quarter turn after each slice, creating a seven-sided shape.
-
Trim the ends to achieve a flat, consistent size, typically 2-3 inches long.
Practice the tournée cut with various vegetables to improve your skills and create visually stunning garnishes or side dishes. Maintain consistent size and shape for a professional look and even cooking.
Develop your own signature cuts for a personal touch
As you become more comfortable with advanced knife techniques, experiment with creating your own signature cuts to add a personal touch to your dishes. Develop unique shapes, patterns, or combinations of cuts to make your plates stand out.
Creating decorative garnishes
Elevate your presentations by learning to create decorative garnishes like radish roses, carrot flowers, or cucumber ribbons. These eye-catching accents showcase your knife skills and attention to detail. To make a radish rose:
-
Trim off the stem and root ends of radish, then carefully make thin, vertical slices around the circumference, keeping the base intact.
-
Place the radish in cold water for a few minutes to allow the “petals” to open up and create a rose-like shape.
Experiment with other vegetables and fruits to create your unique garnishes, and incorporate them into your favorite dishes for a personalized touch.
By mastering advanced knife techniques like julienne, brunoise, and tournée cuts, as well as developing your signature cuts and garnishes, you’ll elevate your dishes and impress your guests with your culinary skills. Practice these techniques regularly to refine your precision and consistency, and don’t be afraid to experiment with new ideas to make your plates truly unique.
What are knife skills and why are they important?
Knife skills refer to the techniques used to cut, chop, slice, and mince ingredients with precision and efficiency. These skills encompass proper knife handling, safety measures, and maintenance practices that ensure optimal performance and longevity of your kitchen knives.
Mastering knife skills involves students learning various cutting techniques, such as:
-
Chopping: Cutting ingredients into roughly uniform pieces
-
Dicing: Cutting ingredients into small, even cubes
-
Slicing: Cutting ingredients into thin, flat pieces
-
Mincing: Finely chopping ingredients into very small pieces
-
Julienning: Cutting ingredients into thin, matchstick-like strips
Developing these skills requires practice, patience, and a thorough understanding of how to handle a knife safely and effectively.
The importance of knife skills in cooking
Good knife skills are crucial in cooking for several reasons:
Consistent cuts for even cooking and better presentation
When ingredients are cut uniformly, they cook at the same rate, ensuring that dishes are evenly cooked and have a better texture. Consistent cuts also contribute to a more attractive food presentation, as the food looks neat and professional on the plate.
Efficient knife techniques save time and effort
Mastering knife skills allows you to work more efficiently in the kitchen, reducing the time and effort required for meal preparation. When you can chop, slice, and dice ingredients quickly and accurately, you can focus on other aspects of cooking, such as seasoning and cooking techniques.
According to a study by the Journal of Culinary Science & Technology, experienced chefs can save up to 30 minutes per day by using proper knife skills compared to those with less developed techniques.
Greater creativity and versatility in the kitchen
With well-honed knife skills, you can tackle a wider range of recipes and ingredients, as you’ll be confident in your ability to prepare them properly. This opens up new possibilities for culinary experimentation and allows you to expand your repertoire in the kitchen.
How knife skills contribute to overall kitchen confidence
Developing proper knife skills has a significant impact on your overall confidence in the kitchen:
-
Building confidence in one’s culinary abilities: As you master knife techniques, you’ll also feel confident and more self-assured in your cooking skills, which can lead to greater enjoyment and satisfaction in the kitchen.
-
Enjoying more adventurous cooking experiences: With increased confidence, you’ll be more likely to try new recipes, experiment with unfamiliar ingredients, and take on more challenging culinary projects.
-
Tackling new recipes and ingredients with ease: Well-developed knife skills enable you to approach new recipes and ingredients without hesitation, as you’ll have the necessary techniques to prepare them properly.
For those looking to further develop their knife skills and culinary confidence, consider the following resources:
-
“Mastering Knife Skills: The Essential Guide to the Most Important Tools in Your Kitchen” by Norman Weinstein
-
“Knife Skills Illustrated: A User’s Manual” by Peter Hertzmann
-
Online classes, courses, and class such as “Knife Skills: A Mini Class to Chop Like a Chef” on Skillshare or “Complete Knife Skills” on Udemy
By investing time and effort into mastering knife skills, home cooks and professional chefs alike can elevate their culinary abilities, save time in the kitchen, and approach cooking with greater confidence and creativity.
Understanding the anatomy of a kitchen knife
Mastering knife skills starts with knowing your tool
Learn the parts of a knife and how they affect performance
Identify the right knife for each task to improve efficiency and precision
Parts of a knife and their functions
Every kitchen knife consists of several key components that contribute to its overall performance and functionality. Understanding these parts and their roles will help you choose the right knife for the job and maintain your tools properly.
Blade
The blade is the most essential part of the knife, as it performs the actual cutting. Blades come in various shapes and sizes, each designed for specific tasks. For example, a chef’s knife typically has a broad, curved blade that allows for rocking motions when chopping, while a paring knife features a short, straight blade for precise tasks like peeling and trimming.
The material and construction of the blade also impact its performance. High-carbon stainless steel is a popular choice for its durability, edge retention, and resistance to rust. Some knives feature forged blades, which are made from a single piece of heated and shaped metal, resulting in a stronger, more balanced knife. Others use stamped blades, which are cut from a large sheet of metal and tend to be lighter and more affordable.
Handle
The handle provides a comfortable and secure grip, allowing you to control the knife safely and efficiently. Handles are made from various materials, such as wood, plastic, or metal, each with its own advantages and disadvantages. Wood handles offer a classic look and feel but require more maintenance to prevent cracking or warping. Plastic and composite handles are durable and easy to clean but may become slippery when wet. Metal handles, often found on high-end knives, provide a sleek, modern appearance and excellent durability, but can be heavy and may feel cold to the touch.
When choosing a knife, consider the shape and size of the handle in relation to your hand. A well-designed handle should feel comfortable and balanced, reducing fatigue during extended use.
Tang
The tang is the portion of the blade that extends into the handle, providing stability and balance. Full tang knives, where the tang runs the entire length of the handle, are generally considered the most durable and balanced. Partial tang knives, where the tang only extends partway into the handle, are lighter and more affordable but may be less sturdy.
Bolster
The bolster is the thick junction between the blade and handle, serving several purposes. It provides balance by adding weight to the knife, helps protect your fingers from slipping onto the blade, and acts as a guard when sharpening the knife. Some knives feature a full bolster that extends to the heel of the blade, while others have a half bolster or no bolster at all. The presence and style of the bolster can affect the knife’s balance and ease of sharpening.
Common types of kitchen knives and their uses
Having the right knife for the task at hand can make a significant difference in your cooking experience. Here are some of the most common types of kitchen knives and their primary uses:
Chef’s knife
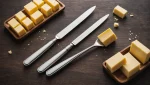
The chef’s knife, also known as a cook’s knife, is the most versatile and essential tool in any kitchen. Its broad, curved blade, typically 8 to 10 inches long, is designed for a wide range of tasks, including chopping, slicing, and dicing vegetables, fruits, and herbs. The curved edge allows for a rocking motion, making it efficient for mincing garlic or herbs. A chef’s knife can also be used for cutting meat, poultry, and fish, although specialized knives may be better suited for these tasks. Intrigued by the chef’s knife? Discover more about this indispensable culinary instrument and why it’s a must-have in your cooking arsenal, much like the butter spreader.
Paring knife
A paring knife is a small, precise tool with a short blade, usually 3 to 4 inches long. Its compact size and sharp point make it ideal for detailed work, such as peeling and trimming fruits and vegetables, deveining shrimp, or removing seeds from peppers. Paring knives are also useful for creating garnishes and other delicate tasks that require control and accuracy.
Serrated knife
Serrated knives, also called bread knives, feature a saw-like edge with sharp teeth. This design allows the serrated knife to slice through foods with tough exteriors and soft interiors without crushing them. Serrated knives are best known for cutting bread, but they also excel at slicing tomatoes, citrus fruits, and delicate pastries like croissants. Wondering when to use a serrated knife? Discover how this type of knife can enhance your kitchen skills, especially for slicing foods with tough skins and soft insides.
Boning knife
A boning knife has a thin, narrow blade, typically 5 to 6 inches long, that is either rigid or flexible. The blade’s shape enables it to maneuver around bones and joints, making it the perfect tool for removing bones from meat, poultry, and fish. The flexible version is particularly useful for working with fish and removing skin from delicate meats. A boning knife can also be used for trimming fat and sinew from cuts of meat. Interested in mastering the art of meat preparation? Discover how the narrow blade of a boning knife can enhance your culinary skills by precisely separating meat from bone.
How to choose the right knife for the task at hand
Selecting the appropriate knife for a specific task not only makes your work more efficient but also safer and more enjoyable. Here are some factors to consider when choosing the right knife:
Size and shape of the food
Consider the size and shape of the ingredients you’ll be cutting. For larger items like melons or squash, a chef’s knife or a cleaver will provide the necessary leverage and weight. For smaller, more delicate ingredients, a paring knife or utility knife will offer better control.
Blade length and shape
The length and shape of the blade should suit the task at hand. Longer blades, like those on chef’s knives, are better for cutting larger items or for tasks that require a rocking motion. Shorter blades, like those on paring knives, are ideal for precise work and in-hand cutting. Curved blades are best for rocking and chopping, while straight blades are better for slicing.
Comfort and balance
A comfortable, well-balanced knife will reduce fatigue and improve control, making your work more enjoyable and efficient. When choosing a knife, hold it in your hand and assess its weight and balance. The knife should feel natural and easy to maneuver, with the weight evenly distributed between the handle and the blade.
Quality and durability
Investing in high-quality knives may cost more upfront, but they will provide better performance and last longer than cheaper alternatives. Look for knives made from high-carbon stainless steel, as this material offers a good balance of durability, edge retention, and rust resistance. Forged blades and full tang construction are also indicators of a well-made, long-lasting knife.
By understanding the anatomy of a kitchen knife and selecting the right tool for each task, you’ll be well on your way to mastering essential knife skills and elevating your cooking experience. In the next section, we’ll delve into the proper techniques for holding and using your knives safely and efficiently.
Sharpen Your Skills and Master the 10 Essential Knife Cuts
Mastering these 10 essential knife cuts is the foundation of becoming a confident and proficient cook. By learning proper cutting techniques, prioritizing safety, and maintaining your knives, you’ll open up a world of culinary possibilities.
Embrace the journey of honing these skills, and watch as your dishes evolve from ordinary to extraordinary. With practice and dedication, you’ll soon find yourself effortlessly executing precise cuts and creating visually stunning plates that impress everyone at the table.
Ready to put your newfound skills into action?
Choose a recipe that challenges you to practice your slicing, dicing, and mincing techniques. As you prepare the dish, focus on maintaining consistent cuts and notice the improved efficiency in your movements. Celebrate your progress and enjoy the delicious results of your hard work.
What dish will you create first to showcase your mastery of these essential knife cuts?