
When someone orders a dish for delivery, the photo does the entire job of selling it. There is no counter display, no smell coming out of the kitchen, no server describing the special. There is a thumbnail roughly the size of a postage stamp on a phone screen, and the customer decides from that.
Food photography for delivery is a different craft from food photography for a cookbook. A cookbook shot can be moody, cropped at a strange angle, half in shadow. A delivery shot has to survive being squashed into a square thumbnail, sit next to eleven competing thumbnails, and then be honest enough that the person opening the box twenty minutes later feels like they got what they paid for. This guide covers the whole job: what to shoot, in what order, what each ordering channel needs, and how to get through a menu’s worth of dishes in one session. The two things that decide whether a photo works at all, the light falling on the plate and the surface underneath it, have their own guides, and this one links out where it touches them.
The Bottom Line
Photos are not decoration on a delivery menu, they are the product page. DoorDash’s own study of more than 15,000 small merchants found menus with item photos earned up to 44% more monthly sales.
Shoot for a square crop even when the platform asks for a landscape file. Uber Eats wants a 5:4 to 6:4 image but renders the thumbnail at 1:1, so anything near the edge of your frame gets cut.
You need four kinds of shot, not one: a hero per item, a header image, a logo, and at least one photo of the food as it actually arrives in the packaging.
The honesty gap is the expensive mistake. A photo that oversells the portion wins the order once and loses the repeat customer when the box opens.
Lower your delivery costs by 23%
How we reduce costs:
- No delivery vehicle expenses
- Optimized local routes
- Pay-per-delivery model
- Average 23% delivery cost reduction
Why food photos decide delivery orders
Adding photos to a delivery menu is the cheapest sales lever most food businesses have, and the measured lift is large. DoorDash studied more than 15,000 small restaurant merchants between April and June 2022 and found that menus carrying item photos earned up to 44% more in monthly sales than menus without them. The same study put the lift from a header image at up to 50% and from a logo at up to 23% (DoorDash, retrieved 2026-10-03). Grubhub has reported a similar pattern, crediting pictures and descriptions together with as much as 70% more orders and 65% higher sales.
Those numbers are worth reading carefully, because the mechanism matters more than the headline. The lift is not coming from photos making food look nicer. It is coming from photos removing uncertainty. A customer browsing a delivery app is making a purchase they cannot inspect, from a kitchen they have never seen, and the photo is the only evidence available that the dish is what the name claims. Remove the photo and the order goes to the listing that has one.
This is also why photo coverage matters more than photo perfection. A menu where 40 items have good phone photos and two have none will lose those two items almost entirely, because an item without a picture sitting next to items with pictures reads as unavailable or neglected. Getting every item covered at a decent standard beats getting six items covered beautifully.
There is a second-order effect that nobody measures and every operator eventually notices. Photos change what people order, not just how much. Put a good picture on the high-margin item and it moves. Leave the picture off and customers default to the thing they already recognise, which is usually the cheapest item on the menu. The photo is a merchandising tool, and the dishes you most want to sell are the ones that most need shooting first.
Metrobi is transforming food product deliveries
Specialized solutions for food product businesses:
- Food product-trained drivers
- Proper handling equipment
- Peak day delivery support
- 23% average cost reduction
What to shoot: the four image types a delivery menu needs
Most food businesses think of menu photography as one job, take a picture of each dish, and then discover halfway through onboarding that the platform wants three other things as well. Plan for four categories from the start.
Item photos. One per menu item, showing that item and nothing else. This is the bulk of the work and the part that drives the sales numbers above. Every platform has the same core rule here: the photo shows the single dish the customer is buying, centred, with no other products crowding the frame.
A header or cover image. One wide photo that sits at the top of your storefront and sets the tone. This is the only shot where you are allowed to be atmospheric rather than literal. A full table, a counter, hands plating something. It is also, per DoorDash’s data, worth more sales lift than any individual item photo.
A logo. Square, clean, legible at thumbnail size. Not photography, but it lives in the same upload queue and it holds up the whole listing if you don’t have a clean square version.
The packed-order shot. The food as it actually arrives: in the box, in the bag, sealed. Almost nobody shoots this and it is the single most useful image a delivery business can own. It goes on your own website, in your confirmation emails, on your social accounts, and in any conversation with a wholesale buyer who wants to know what lands on their counter. It is also the shot that makes the other photos credible, because it shows you are not hiding the packaging.
Shoot in that order of priority if you are short on time: highest-margin items first, then the header, then the rest of the menu, then the packed order. If the full list looks impossible this month, the realistic shortcut is to shoot fewer dishes properly and clean the files up afterwards rather than to generate the gap. That distinction, between enhancing a real photo and inventing one, is covered in our guide to AI product photography.
Food photo angles that work on a delivery menu
Two angles cover almost every dish, and picking the wrong one is the most common reason a competent photo still looks flat.
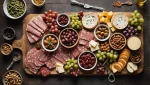
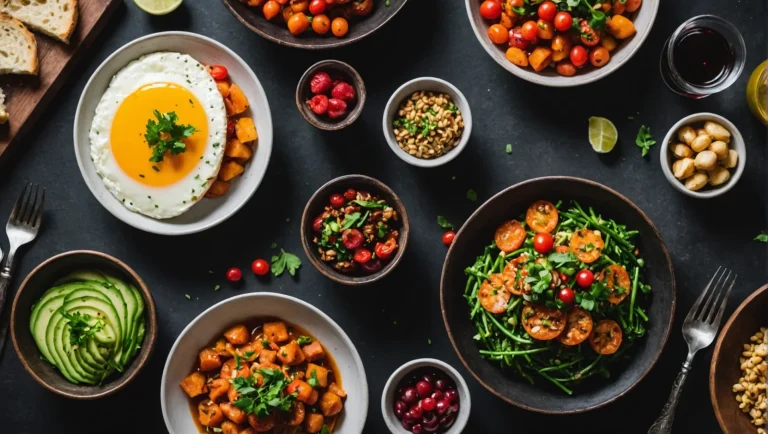
Overhead, straight down, for anything flat. Bowls, pizzas, salads, grain bowls, charcuterie boards, anything where the interest is in the arrangement across a surface. From directly above you see the whole composition, the colours separate cleanly, and the dish fills a square crop neatly. This angle is also the most forgiving of a cluttered kitchen, because the background is just the surface.
45 degrees, roughly eye level with a seated diner, for anything with height. Burgers, layer cakes, stacked sandwiches, drinks, anything where the point is how tall or how layered it is. Shoot a burger from above and it becomes a circle of bun. Shoot it at 45 degrees and you see every layer.
A straight-on 90-degree side shot is the third option and it is specialised: useful for a drink in a glass or a slice of cake where you want a clean cross-section, awkward for almost everything else because the plate disappears into a line.
Whichever angle you pick, frame for the square. Uber Eats asks merchants for item photos between 5:4 and 6:4 aspect ratio, but the app crops menu thumbnails to 1:1, so whatever you put in the outer edges of a landscape frame will not survive the crop. Leave deliberate space around the dish. A photo that looks slightly too empty on your laptop will look correctly framed on a phone.
Consistency beats individual brilliance
The thing customers actually register is whether your menu looks like one menu. Same surface, same light direction, same distance, same crop ratio across all forty items. A grid where every tile was shot in a different place reads as unfinished even when each individual photo is good, and it quietly undermines trust in the kitchen. Pick one setup and use it for everything, which is a strong argument for shooting the whole menu in one session rather than adding dishes one at a time over six months.
Delivery app photo requirements for DoorDash and Uber Eats
Platform rejections are almost always about specs rather than aesthetics, and the specs are published. Shoot at the highest resolution your phone or camera offers and you will clear the minimums everywhere; the parts that catch people out are aspect ratio and the rules about text.
| Uber Eats | DoorDash | |
|---|---|---|
| Item photo minimum | 440 px height, 550 px width (1200 × 800 recommended) | 1400 × 800 px |
| Item aspect ratio | 5:4 to 6:4 recommended, thumbnail cropped to 1:1 | 16:9 landscape |
| Max file size | 10 MB | 16 MB (item photos) |
| Formats | JPG, PNG, GIF | JPG, JPEG, PNG |
| Logo | Not specified | 230 × 230 px minimum, 1:1, under 2 MB |
| Header / cover | 2880 × 2304 px, JPEG, 5:4 | 1400 × 800 px minimum, under 2 MB |
Sources: Uber Eats store submitted menu photo guidelines and DoorDash menu photo terms, both retrieved 2026-10-03.
The content rules are stricter than the technical ones and they are where rejections come from:
-
No text, logos, watermarks or borders on item photos. Both platforms refuse them. The one exception Uber Eats allows is text that naturally appears on the food or its packaging. Your “NEW!” starburst will be rejected.
-
One item per photo. A shot of the burger with the fries and the drink will be rejected on a menu where the burger is sold alone.
-
No people except hands. A server’s face in frame fails.
-
Nothing blurry, dark, or showing an unsanitary surface. This is the rule that most often fails phone photos taken in a hurry on a wet prep bench.
-
Never stretch or squeeze to hit the ratio. Re-crop instead. A distorted image is rejected and a distorted dish looks wrong even when it isn’t rejected.
How to run a whole menu shoot in one session
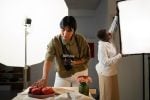
The realistic constraint is not skill, it is kitchen time. Here is a sequence that gets a forty-item menu photographed in an afternoon without stopping service.
-
Pick the spot and leave it set up. One table near the largest window, one surface, one reflector. Mark the camera position with tape so every shot is the same distance and height. The whole point is not moving anything between dishes.
-
Shoot in daylight, in a block. Mid-morning or early afternoon on an overcast day is ideal, because the light stays consistent for hours. A bright sunny window changes character every twenty minutes and your first ten photos won’t match your last ten.
-
Batch by similarity, not by menu order. All the bowls, then all the sandwiches, then all the drinks. Same angle, same props, almost no resetting between shots.
-
Plate for camera, not for service. The plate the camera sees should be freshly wiped, slightly under-filled rather than over-filled, and arranged with the best-looking components facing the lens. Keep a small toolkit on the table: tweezers, a damp cloth, a brush and a little neutral oil for anything that dulls under lights.
-
Shoot the fast-dying things first. Ice cream, anything with melting cheese, anything dressed, anything fried. Salads and cold plates hold for ten minutes; a scoop of gelato gives you ninety seconds.
-
Take four frames of every dish and move on. Two at your chosen angle, one slightly wider for crop room, one detail shot. Reviewing on a laptop later is faster than agonising on the spot.
-
Edit all of them the same way. Pick one set of adjustments (exposure, white balance, a touch of contrast) and apply it across the batch. Resist editing dishes individually; that is how a menu ends up with forty different colour temperatures. Desktop editors are better suited to this than phone apps because they let you copy one set of settings across a whole folder; Skylum’s Luminar is one worth looking at for a menu shoot in particular, because alongside the usual batch adjustments it includes a GenExpand tool for stretching a landscape frame into the square crop the apps want, and it’s sold as a one-time perpetual licence with a seven-day free trial rather than another monthly subscription.
The session that produces the most value per minute is the one where somebody is plating while somebody else is shooting. Two people get through a menu roughly three times faster than one person doing both.
Light and surface: the two variables that decide everything else
Nearly every bad food photo fails on one of two things, and neither is the camera.
The first is light. Diffused window light from the side or slightly behind the dish, with a white card bouncing fill into the shadow side, handles almost every dish you will ever shoot. Hard overhead kitchen fluorescents are the enemy: they flatten texture, throw a green cast, and put a hard shadow right where the food is. If you shoot after dark or in a windowless prep area, a single large LED panel through a diffuser is the standard fix. Our guide to food photography lighting covers the setups in detail, including what to buy at the cheap end and how to get soft light out of a room that doesn’t have a good window.
The second is what the dish sits on. The surface is doing more work than people expect, because it occupies most of a square crop. Matte beats glossy, because glossy surfaces throw reflections straight back at the camera. Neutral and slightly textured beats patterned, because pattern competes with the food. And for delivery work specifically, the surface has to be washable and has to survive being used three hundred times, which rules out most of the pretty options. The full breakdown of food photography backdrops covers what to buy, what to make, and which materials hold up in a working kitchen.
Shoot the dish the way it actually arrives
Delivery photography parts company with restaurant photography here, and this is where most menus quietly mislead.
In a dining room, the plate the photographer shoots is the plate the customer receives. In delivery, it isn’t. The customer receives a portion in a container, probably with the sauce in a separate pot, probably with the garnish gone, after twenty-five minutes in a bag. If your menu photo shows a restaurant plate-up with a sprig of something and a sauce swirl, you have photographed a dish the customer will never see.
Three practical adjustments:
-
Photograph the delivery portion. Weigh it if you have to. The photo should show the amount of food that actually goes in the box, which is often less than what a chef instinctively plates for a camera.
-
Show the container at least once. Either in the item photo itself, if your packaging is good, or in a dedicated packed-order shot on your own site. Customers have been burned enough times that visible, honest packaging is a selling point rather than a compromise.
-
Drop the garnishes you don’t actually send. A herb leaf in the photo that isn’t in the box is a tiny promise you break on every single order.
Both major platforms already require this in principle, since Uber Eats states plainly that images must accurately represent the item, but the enforcement is loose and the real penalty is commercial rather than regulatory. An oversold photo converts the first order and loses the second. Given that repeat ordering is where delivery margins actually live, the honest photo is the profitable one.
Packaging and photography are the same problem viewed from two ends: both exist to make sure what the customer imagined and what the customer unpacks are the same thing. If the honest photo of your dish looks bad, the fix is usually the packaging, not the camera.
When AI-generated food images belong on a menu
AI image tools now sit in the middle of this workflow, and they split cleanly into two uses with very different risk profiles.
Enhancement is generally safe. Correcting white balance, removing a stray crumb, cleaning up a background, extending the canvas so a landscape shot fits a square crop. All of these start from a real photograph of your real food and change things the customer will never notice.
There is also a third category that gets overlooked: the imagery around the menu rather than on it. Promotional banners, seasonal social posts, the background of an email header, the illustration on a category tile. None of that is a product the customer is buying, so a generated image is entirely appropriate, and general-purpose generators handle it cheaply. Visme’s AI image generator sits inside a design tool, so the generated image lands straight into the banner or social template you were building, and its FAQ puts the free allowance at 10 prompts a month against 500 on premium. Picsart’s AI image generator is the more photography-oriented of the two, with reference-image uploads, custom aspect ratios and output up to 8K, and a free tier capped at a limited number of generations per day. For a seasonal promo graphic, either beats paying for a stock photo.
Generation for the dish itself is not. A dish that was never cooked, generated from a text prompt, placed on a menu as the item the customer is buying, is a misrepresentation regardless of how good it looks. It also breaks the platforms’ own accuracy requirements. The grey zone in between, a real product dropped into a generated scene or a generated background behind a real dish, is where judgement is actually needed, and that depends on whether the generated part is anything the customer is paying for. Our guide to AI product photography goes through the specific tools, what each one costs against a real shoot, and where the accuracy line sits.
Frequently asked questions about food photography for delivery
Do I need a real camera, or is a phone enough?
A recent phone is enough for delivery menu photography, and in some ways better: the thumbnails are small, the platforms cap resolution well below what a phone produces, and the automatic processing handles food reasonably well. Shoot in the highest-quality setting, turn the flash off permanently, and spend the money you saved on a light and a decent surface instead. The gap between a phone photo in good light and a camera photo in good light is far smaller than the gap between good light and bad light.
How many photos does a delivery menu need?
One per item, ideally all of them. Partial coverage is worse than it sounds, because items without photos sitting next to items with photos get skipped. If you cannot do the whole menu at once, start with your highest-margin dishes and your best sellers, and finish the rest within the same month so the whole listing is consistent.
Why do delivery platforms keep rejecting my photos?
Almost always one of four things: the image is below the minimum resolution, the aspect ratio is wrong or the image was stretched to fit it, there is text or a logo overlaid on the picture, or more than one menu item appears in the frame. Check those four before you reshoot, because the photo itself is usually fine.
How often should menu photos be reshot?
Reshoot an item whenever the recipe, the portion or the packaging changes, because at that point the photo is no longer accurate. Otherwise, a full refresh every two to three years is reasonable. Photos age mostly through drift: a dish that has quietly changed and a photo that hasn’t.
Can the same photos be used on my own website and on delivery apps?
Yes, and you should. The same item shots work across your own online ordering page, your delivery app listings and your social accounts, which is the main reason to shoot the whole menu in one consistent session. The only files you will need to make separately are the crops, since each channel wants a different shape from the same original.
Start with the dishes you most want to sell
The whole job comes down to a sequence: pick one spot with good light, pick one surface, shoot your highest-margin items first in a single consistent session, frame everything for a square crop, and make sure the photo shows the portion that actually leaves the kitchen. Everything else is refinement.
The dishes that benefit most are the ones you are currently selling least of relative to their margin. Those are the listings where a photo changes the decision, and they are the right place to spend the first afternoon.